• Hey All! Lately there has been more and more scammers on the forum board. They register and replies to members requests for guns and/or parts or other things. The reply contains a gmail or hotmail address or similar ”anonymous” email addresses which they want you to reply to. DO NOT ANSWER ANY STRANGE MESSAGES! They often state something like this: ”Hello! Saw your post about purchasing a stock for a Safari. KnuckleheadBob has one. Email him at: [email protected]” If you receive any strange messages: Check the status of whoever message you. If they have no posts and signed up the same day or very recently, stay away. Same goes for other members they might refer to. Check them too and if they are long standing members, PM them and ask if the message is legit. Most likely it’s not. Then use the report function in each message or post so I can kick them out! Beware of anything that might seem fishy! And again, for all of you who registered your personal name as username, please contact me so I can change it to a more anonymous username. You’d be surprised of how much one can find out about a person from just a username on a forum such ad our! All the best! And be safe! Jim

Short Actions Guidelines for Accuracy

Sako Collectors Club Discussion Forum

Hi Chris

I appreciate the input. That said I am a bit paranoid when it comes to bullet jump. While Barnes recommends it for certain bullet types that they manufacture, I am more concerned about throat erosion and accuracy improvements when jump is virtually eliminated.

rick
 
Yeah... and I haven't much experience with the newer Barnes bullets... so can't comment from any first-hand knowledge. All my Barnes experience is with their original .348 Win bullets, sort of a different horse altogether. :)

-Chris
 
Get the tools together you need for Handloading

I’m getting ahead of myself. So, let me rewind the tape for our novice handloaders and start from the beginning. I know that I published a list of reloading equipment for beginners. But, I was thinking that more was needed than just a set of links to products for sale on Ebay. My new list might appear to be somewhat daunting. Rest assured that I am only recommending what I believe to be the minimal equipment necessary to get started handloading.

The Reloading Bench

For starters, you will need a sturdy reloading bench. There are literally dozens of reloading bench designs and plans for them available on the Internet. Here is one simple design that I selected for its’ simplicity and relative easy construction using off the shelf components. Obviously, you can build a reloading bench like this one using 2x4’s, and plywood. The cost should be nominal and the bench can be built in a size that is convenient for the space available.

upload_2020-11-19_12-39-1.jpg


Reloading Manuals

I recommend several reloading manuals that will provide a range of load data for the cartridge that is being reloaded. At the very least you should have a manual that is produced by the bullet manufacturer of the bullet that you have selected to use. Used manuals are available from a variety of sources but I found that Ebay is an excellent source for them. Keep in mind that you don’t need the latest and greatest of manuals. Oldies but goodies work just fine. I have included a sample of the type of loading data that you may see in any one of the many manuals available.

Loading data in them is generally grouped from the smallest caliber bullets, their weights and the specific cartridge being loaded progressing to larger heavier bullets and their respective cartridges. Quite frequently you will see tables like the one below with faster burning powders at the top of the chart moving down to slower burning powders at the bottom of it.

upload_2020-11-19_12-39-1.jpg upload_2020-11-19_12-39-1.jpg
 
The internet as a source for accurate handloads

All of this said the internet has become a source for handloads for virtually every cartridge including wildcat loads. For the beginner it should be possible to search the internet and find loads for a variety of pet loads that have been proven to produce sub minute of angle (MOA) accuracy.

In these articles you should be able to find information of the test rifle, bullet, cartridge case, primer, powder and the charge. Using this information should give a beginner a leg up on the process of working up an accurate load. I believe this to be true given the plethora of reloading components available in the market place.

The Reloading Press

You will need to select a reloading press. I started with an RCBS Rockchucker and until I switched to the venerable RCBS A2 press (that are very expensive to get a hold of these days). The Rockchucker Press was my go to machine for reloading and case forming.

upload_2020-11-19_12-39-33.jpg

Reloading Dies

A set of reloading dies for the actual loading operation is needed. I prefer to put together a three die set for bottle neck cartridges to include a full length die, bullet seating die and a neck sizing die.

upload_2020-11-19_12-39-33.jpg upload_2020-11-19_12-39-33.jpg

The shell holder

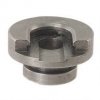
A shell holder is also needed to hold the case in place during the resizing/decapping operation, primer seating operation and during the bullet seating operation. Decapping is the operation that occurs simultaneously within the case resizing operation. Decapping is the process of removing the spent primer from the case prior to cleaning the primer pocket and seating a new primer prior to charging the case with a powder charge.

upload_2020-11-19_12-39-33.jpg

Resizing and decapping the spent cartridge

Now comes the time to resize the case and at the same time complete the decapping operation. Both of these operations are performed by a full length resizing die and in addition the neck sizing die performs a similar function but only the case neck is resized.

Here is how it works. Inside of the full length resizing die and the Neck Sizing die is the decapping rod. In either case, it is inserted into the top of the die and is held in place by a guide bushing. As you can see in the diagram, the guide bushing is threaded and screws into the top of the sizing die. The expander/decapping rod is also threaded and screws into the Guide Bushing. As it protrudes through the top of the Guide Bushing it is locked in place by a Locking Ring that secures the rod to the Bushing.

The end of the rod is usually threaded and Expander Ball screws onto the threaded end of the rod. In addition the rod the decapping pin slides inside of the expander ball and the pin protrudes for expander ball and is locked into place once the ball is screwed onto the end of the rod and tightened.

As you can see in the diagram, the decapping pin protrudes through the flash hole in the bottom of the case enough to force the spent primer out of the bottom of the case. Care must be taken when adjusting the expander/decapping rod so that the expander ball does not jam into the bottom of the case. If this occurs that rod can be severely damaged, bent and the decapping rod can be damaged as well. So take your time when adjusting the expander/decapping rod in the sizing die.

upload_2020-11-19_12-39-33.jpg
 
upload_2020-11-19_12-40-14.jpg

When a case passes through the sizing die the expander ball passes through the case mouth and the case is pushed into the sizing die until the shell holder presses up against the bottom of the sizing die. As the case is removed from the die the case mouth passes over the expander ball. The diameter of the expander ball resizes the case mouth to the correct diameter for seating the bullet and holding it in place with proper case mouth tension.

A word of caution about the cross-section diagram of the bullet seating die. It shows the shell holder up against the bottom of the bullet seating die. In this position the internal crimping ring that is machined inside of the die will be engaging the case mouth and attempting to crimp the bullet in place. If the crimping function is not desired the top of the shell holder (on the full upstroke of the ram) should not be any closer than 1/16th of an inch from the bottom of the bullet seating die.

Now we have a good segway into the resizing process. Regardless of neck sizing or full length case resizing lubrication must be applied to the case. For neck sizing all that is needed is that the neck of the case be dipped into a container of dry lubricant before the case is inserted into the neck sizing die for sizing and decapping of the case.

Lubricating the cartridge case using dry lubricant

upload_2020-11-19_12-40-14.jpg

Lubricating the cartridge using a case lube pad

If the case is to be full length resized then the case will need to be gently rolled on a lubricating pad and the inside of the neck coated with a very lite coat of dry lubricant before resizing and decapping the case.


upload_2020-11-19_12-40-14.jpg upload_2020-11-19_12-40-14.jpg

A word of caution here about full versus neck resizing of the case. Once a case has been fire formed in the firearm that the reloaded cartridges are being made for, neck sizing is really all that is necessary to size and decap the case prior to reloading it for a subsequent firing.

Under normal circumstances one can expect to get 5 to 10 reloadings per case before trimming the case (cases stretch a very small amount when fired). After 5 to 10 firings a case will need to be trimed to remove material from the case mouth to return it to the proper length. I am not going to go into case trimming in this thread.

Cleaning the primer pocked with a primer pocket brush

After resizing and decapping a primer pocket brush will be needed to clean out the primer residue from the primer pocket. This residue is what is left in the primer pocket after the cartridge is fired. The residue must be removed before seating a new primer into the pocket.

upload_2020-11-19_12-40-14.jpg

There are a lot of primer pocket cleaning gizmos available in the market place. I recommend a brush because it does not remove metal from the bottom of the primer pocket in the case.

upload_2020-11-19_12-40-14.jpg
 
Chamfering and deburring the case mouth

Additional case preparation is needed before seating a new primer. These include chamfering the case mouth and deburring the exterior of the case mouth. Performing these operations requires using a special tool for this purpose.

upload_2020-11-19_12-40-49.jpg upload_2020-11-19_12-40-49.jpg

I usually chuck the deburring tool into the chuck of a small electric drill by grabbing a hold of the small pin at the base of the tool. I spin the chamfering tool slowly and gently push the case onto the cutting edge of the chamfering tool sufficiently to remove a small amount of metal. This process creates a small bevel in the case mouth that provides a smooth surface that guides the bullet into the case mouth. This bevel prevents the bullet from binding on the mouth of the case and prevents collapsing of the case neck during the bullet seating process.

After completing the chamfering process gently tap the case mouth on a piece of cardboard to shake out any brass fragments that may have fallen inside of the case during the chamfering process.

Primers

Primers come in many different flavors. Small and Large Rifle and similar sizes for pistol and magnum cartridges. You should only us primers sized for a specific cartridge. Never ever attempt to use magnum primers in a cartridge that is not designed for their use. To do so increases the possibility of a wrecked rifle and death to the shooter. Remember that handloading is a balance between the energy released by the explosion that takes place within the cartridge case and the pressure that the explosion generates. Too much pressure and the primer can blow out, that case can separate in the chamber, the bolt can fail or any combination of the above. So remember, it is your life and eyesight that is on the line so don’t take chances when handloading.

upload_2020-11-19_12-40-49.jpg

The Primer tray

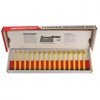
You should also get a hold of a primer tray. I use the RCBS tray because I can shake out a row of 20 primers into the tray and with a little shaking the groves in the bottom of the tray flip the primers so they all end up face up in the tray. The lid serves to protect the primers until they are used to prime cases for charging.

upload_2020-11-19_12-40-49.jpg

Boxer primers

For our purposes in this thread I will only be talking about Boxer Primers. Below is a cross-section of the Boxer Primer and how it seats into the primer pocket in the cartridge case. There is also a nice picture of a primer showing the business end and the internal view. Keep in mind that Boxer Primers come in different flavors. Some have an anvil with three prongs while others have a two pronged anvil.


upload_2020-11-19_12-40-49.jpg

upload_2020-11-19_12-40-49.jpg

Handheld primer seating tools

Primer seating tools are available in a variety of configurations from very simple hand held tools that are straight forward to more complex bench and press mounted devices. Below is one of my favorite hand held primer seating tools.

upload_2020-11-19_12-40-49.jpg
 
Press mounted primer seating tools

The picture below is of a typical press mounted priming tool. The device on the right has a tube that holds either large or small diameter primers. The primer pick-up arm is held in place in the reloading press by a small pin. The pick-up arm picks up a single primer when it is positioned under the dispenser. The cartridge is held in place in the ram and when the ram is elevated in the press the arm is moved forward in the grove machined in the ram. It is placed under the case and when the ram is lowered the primer is seated in the primer pocket in the base of the case.

upload_2020-11-19_12-41-28.jpg upload_2020-11-19_12-41-28.jpg

A more automated primer seating tool consists of a die that mounts in the top of the press much like a sizing or bullet seating die. The shell holder slides into the top of the die and the case is inserted into the shell holder. A new primer is inserted into the primer holding ram. When the ram is moved upward the new primer is seated into the case.

upload_2020-11-19_12-41-28.jpg

The reloading scale

You will need a scale for weighing the powder charges. My go to scale for over 50 years is the Lyman M5. You can find them listed on Ebay. This scale is very accurate and allows you to weigh powder and bullets down to less than a tenth of a grain.


upload_2020-11-19_12-41-28.jpg

The powder measure

You will also need a set of powder measures to meet out a powder charge that is close to but that does not exceed the weight of the desired powder charge. I use a set of powder measures for this purpose and haven’t found the need to go to a mechanical powder measure.

upload_2020-11-19_12-41-28.jpg

The powder trickler

Another must have is a Powder Trickler. This little device dispenses one grain of powder at a time and is used to dispense powder into the powder pan on the scale to bring the load up to the desired weight. Using the scale and powder trickler provides the ability to dispense the powder to the exact load desired. And I mean down to the exact load!

upload_2020-11-19_12-41-28.jpg upload_2020-11-19_12-41-28.jpg

The loading block

You will also need a loading block to hold the cases as they progress through the various reloading steps from resizing and decapping, primer pocket cleaning, priming, loading with powder, setting and seating the bullet to the finished product.

The loading block also allows be to make five rounds of progressively increased powder weight so I can test the accuracy of them during a test firing for accuracy session at the range.

upload_2020-11-19_12-41-28.jpg

The powder funnel

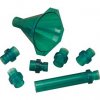
You will also need a powder funnel for dispensing the powder into the primed case.

upload_2020-11-19_12-41-28.jpg

Once I charge a case I insert a bullet into the case nose down. This process tells me that the case is charged and is ready for bullet seating.

I have already described the process for creating a dummy round that utilized the specific bullet that I am loading for. With the bullet seating die setup for the specific bullet I can get on with the process of seating the bullets and creating a finished round.

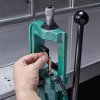
Below is a great picture of a bullet being seated into a newly primed and charged cartridge.

upload_2020-11-19_12-41-28.jpg

Documenting the handload

All that is left to do now is to document the handloads as you are making them. I recommend that you document groups of the same load.

Date:

Bullet Manufacturer:

Bullet Type:

Bullet Weight:

Primer Manufacturer:

Primer type:

Powder:

Weight in Grains:


Keeping accurate records are paramount to working up reloads and keeping track of their accuracy.
 
The reloading scale

You will need a scale for weighing the powder charges. My go to scale for over 50 years is the Lyman M5. You can find them listed on Ebay. This scale is very accurate and allows you to weigh powder and bullets down to less than a tenth of a grain.


These were sold under the name of Lyman and later by RCBS, but they were made by Ohaus and also sold under the manufacturer's name. You can pay more, but they are about the best balance beam scale you can buy and are MUCH more consistent and accurate than any of the electronic scales on the market. They even come with a doubling weight for weighing items up to 1000 grains, and the weight also serves as a check weight, having its weight in grains stamped on it. For longer term storage they easily disassemble and stow in the aluminum frame with a plastic cover that snaps securely over the whole thing.
 
Way to go Stone. I agree with everything you said. My M5 is over 50 years old and still going strong. With it I measure powder charges down to zero deviation on the scale. That translates to perfect powder charges that all weight exactly the same. I also use it to weigh bullets and group them into lots of the same weight. I'm a firm believer of doing this to achieve maximum accuracy in my handloads.

I had to break up my previous posts because of limitations imposed by our site on the length of my posting. I'm in the process of writing the next installment of the thread and hopefully will have it ready to post a few days from now.

rick
 
As a largely self taught handloader, I appreciate the time you put in to this post.
It is an excellent distillation of the most important processes.
Anyone starting out handloading would be well advised to begin by reading this post.
It took me years to acquire the tools and books all of which you reference.
I hope some of the beginners here read your post.
I tip my cap to you sir.
 
Hi Unclekax
I appreciate the compliments. Stay tuned as there is more to come. If you have read some of the other threads that I have started then you know that I'm very interested in sharing information that will be helpful to our readers and at the same time stimulate additional conversation around the topic.

Thanks Again for your kind words.

rick
 
Well, here we go again!

Now that you have the reloading equipment, what next!

Life is full of decisions. In the case of reloading components, there is so much stuff available in the market place trying to find the sweet spot for your rifle may appear to be a daunting and expensive process. To that end I’ll try to make this process simple and less expensive than you might think.

Keep in mind that powder is expensive. IMR 4895, 4064, 4350, and 3031 cost $30 per pound. So if you plan on having a variety of powders on your loading bench powder alone is going to cost an arm and a leg and we are just getting started.

Primers on average use to cost $40 per 1000 primers (if you can find them!). Now the same brick of 100 primers can cost upwards of $200. But what if you want to try several different primers? Once again a brick (1000 primers) of primers is going to be rediculously expensive. Two or three bricks will run the cost up and increases the complexity associated with working up the handloads.

There are literally hundreds of bullet combinations that are available especially when you consider the variety of bullets manufacturers produce in the same bullet diameter. Consider Hornady, Sierra, Nosler, Speer, Berger and the many others that produce bullets of the same caliber, weight, and configuration as their competitors.
 
Check out the list of bullet manufacturers that I found on the internet…

upload_2021-4-19_11-53-15.png

Berger Bullets

Berger makes rifle bullets used for target, varmint, hunting and tactical shooting applications. There bullets are made to match grade standards, which means that the highest quality materials, highest tolerance tooling and commitment to detail in the manufacturing process.

See Berger Bullets Products

upload_2021-4-19_11-53-16.png

Cutting Edge

Cutting Edge's advanced machining capabilities create a technically advanced copper bullet that performs better than any other bullet in terms of trajectory, accuracy, and terminal performance. Their bullets employ a hollow point design that holds together well if bone is hit yet expands rapidly when bone is not hit causing massive amounts of damage. Cutting Edge's patented SealTite? Band seals the bullet into the rifle barrel grooves, preventing blow-by in all but the most worn out barrels. Typically, this does not happen with other solid copper bullets because copper does not upset, or expand, when fired to seal in the barrel as jacketed bullets are capable of doing.

See Cutting Edge Products

upload_2021-4-19_11-53-16.png

Sierra

For years shooters have associated accuracy and superior ballistic performance with one name more than any other - Sierra. On the range or in the field, Sierra bullets offer that extra margin of performance that shooters can depend on.

See Sierra Products


upload_2021-4-19_11-53-16.png

Barnes

In 1932, Fred Barnes began selling bullets made in his Bayfield, Colorado basement workshop. Over the next 40 years, the company gained a solid reputation by offering premium bullets to hunters who "rolled their own". The Barnes Original became known as the top choice for African game.

Randy & Coni Brooks infused young blood and new life into the company when they purchased Barnes in 1974. Product performance, innovation and passion forged their dreams for the business into reality.

See Barnes Products


upload_2021-4-19_11-53-16.jpg

Nosler

The World's Finest Bullets, Ammunition, Rifles, & Brass. They manufacture Partition, AccuBond, E-Tip, Ballistic Tip, BT Lead Free, Custom Competition, Solid, and Handgun Bullets.

See Nosler Products


upload_2021-4-19_11-53-16.png

Barts

You have found the home of world's most accurate bullets! Bart's bullets have won every major competition in bench rest and have set over 50 world records.

See Barts Products

upload_2021-4-19_11-53-16.jpg

Berry's Bullets

World renowned for over 60 types for Superior Plated Bullets, Berry's also provides a line of injection molded reloading products such as ammo boxes, vibratory case cleaning tumblers, & media sifters. With the capability of there state of the art CNC shop they also produce the innovative VersaCradle® gun vise & accessories.

See Berry's Bullets Products


upload_2021-4-19_11-53-16.jpg

Hornady

"Ten bullets through one hole" is the philosophy that brought Hornady® from a two-man operation in 1949, to a world-leading innovator of bullet, ammunition, reloading tool and accessory design and manufacture today.

See Hornady Products


upload_2021-4-19_11-53-16.png

Rocky Mountain

Rocky Mountain is dedicated to making the most advanced bullets available to the public and the military. They hold many records in competitions and there product speaks for itself.

See Rocky Mountain Products

upload_2021-4-19_11-53-16.jpg

Speer

Speer bullets are made for shooters by shooters. They understand shooters and their needs. Every product they make reflects that fact.

See Speer Products


upload_2021-4-19_11-53-16.jpg

Swift

Swift makes bullets that shoot straight and they make bullets that provide great terminal performance. Remember your bullet, at whatever the cost, is the least expensive, most important part of your hunt - many hunters all over the world know this and purchase there bullets.

See Swift Products


upload_2021-4-19_11-53-16.png

Winchester

Seen in the hands of countless cowboys and Indians in countless Westerns, the Winchester rifle is often hailed as one of the guns that "won the West." The rifle that became the Winchester had a long, tortuous development that involved some of the era's most influential businessmen and inventors.

See Winchester Products


upload_2021-4-19_11-53-16.jpg

Cast Performance

Cast Performance manufacture both gas checked and plain base for most popular handgun hunting calibers. There bullets do not lead your bore. Their lube has allowed them to shoot cast bullets in test rifles as fast as 3100 fps.

See Cast Performance Products


upload_2021-4-19_11-53-16.jpg

Maker Bullets

Visit the Maker Bullets website See Maker Bullets Products


upload_2021-4-19_11-53-16.jpg

Missouri Bullet

Missouri Bullet Company offers premium lead bullets at affordable prices. They make hardness optimized bullets for the velocity of the loads you shoot.

Visit the Missouri Bullet website See Missouri Bullet Products

upload_2021-4-19_11-53-16.png

Rainier Ballistics

Rainier Ballistics makes the world's finest copper plated bullets. The company's line of Total Copper Jacketed LeadSafe&tm; bullets are sold throughout the world.

Visit the Rainier Ballistics website See Rainier Ballistics Products

upload_2021-4-19_11-53-16.png


Reloading Components


From first-quality brass, to bullets and wads precision-engineered to the highest standards, to the industry’s most advanced primers and percussion caps – Remington’s components give you the edge to develop your best loads for your favorite pursuit.


As you can see there are many suppliers and more that I have not listed. So what are you going to do considering that the cost of purchasing a variety of different bullets is going to add up quickly.
 
Here is my advice to resolve this problem.

Consider rifling twist rate

You must take into consideration the rifling twist of your barrel. Here is how the rifling twist rate translates. A twist rate of 1 in 7 means that the bullet makes a complete revolution for every 7 inches that it travels down the barrel. Similarly a 1 in 12 twist rate translates into the bullet making one complete revolution for every 12 inches that it travels down the barrel.

As such, rifling twist has a lot to do with accuracy. For example, a 1 in 7 twist translates into loading heavier and longer bullets.

A twist rate of 1 in 10 or 1 in 12 means that a fairly wide variety of bullets will shoot with reasonable velocity and somewhat predictable accuracy.

As a result it is necessary to decide what the intended target is going to be.

It rests with you to make the right call when it comes to bullet selection. Many people think that the lighter the bullet the faster that they can push it. This belief is so far from the truth it isn’t funny.

Use this information to determine the grain weight of the bullets that should perform optimally in your rifle given the twist rate.

I addition you can use this information to select just the optimum bullet to maximize your rifle’s performance.

Here is a picture of the 14 Caliber Barrel that I got from PacNor to build my 14 Walker Horrnet.


upload_2021-4-19_11-54-21.jpg


As you can see there are a number of head stamps on the butt end of it. They translate as follows:

14 is the caliber.
7 is the twist rate.
3 is the number of lands.
SM stands for Super Match.

Notice there isn’t anything to indicate the bore diameter. I had to go back to PacNor and ask them to tell me what the bore diameter actually was. Fortunately Kathy and Jay were very helpful and responsive to my request for this information.

Bore was .140, grove .144 (3 is the land & grove.)

Now I have complete information on the barrel that I will need to select the configuration and grain weights of the bullets that I will load to maximize accuracy of the little rifle.


Keep in mind that the head stamp on the barrel is normally cut off or machined off as the barrel is threaded and chambered for the intended cartridge.

How to Determine Barrel Twist Rate


I snagged this article from Accurate Shooter.Com

How to Determine Barrel Twist Rate

Sometimes you’ll get a barrel that doesn’t stabilize bullets the way you’d anticipate, based on the stated (or presumed) twist rate. A barrel might have 1:10″ stamped on the side but it is, in truth, a 1:10.5″ twist or even a 1:9.5″. Cut-rifled barrels, such as Kriegers and Bartleins, normally hold very true to the specified twist rate. With buttoned barrels, due to the nature of the rifling process, there’s a greater chance of a small variation in twist rate. And yes, factory barrels can be slightly out of spec as well.

Before you purchase a bunch of bullets and set off to develop loads it’s wise to determine the true twist rate of your new barrel. Sinclair International, in its Reloading Press Blog provides a simple procedure for determining the actual twist rate of your barrel. Read on to learn how….

How Twist Rate Affects Bullet Stability

Most of you know that the twist of the rifling in the barrel is what puts spin on the bullet. As a bullet is pushed down the barrel and compressed into the rifling, the bullet follows the path or twist of the rifling. The combination of velocity and bullet spin is what stabilizes the bullet. Finding the twist rate for your barrel will help you in selecting appropriate weight bullets for your firearm. Remember, the general rule is that the faster the twist rate for a given caliber, the longer the bullet (of that caliber) you will be able to stabilize. (Generally speaking, a longer bullet will also be a heavier bullet, but the bullet geometry dictates the needed twist rather than the weight per se.)

Determining Barrel Twist Rate Empirically

Twist rate is defined as the distance in inches of barrel that the rifling takes to make one complete revolution. An example would be a 1:10″ twist rate. A 1:10″ barrel has rifling that makes one complete revolution in 10 inches of barrel length. Rifle manufacturers usually publish twist rates for their standard rifle offerings and custom barrels are always ordered by caliber, contour, and twist rate. If you are having a custom barrel chambered you can ask the gunsmith to mark the barrel with the twist rate.

upload_2021-4-19_11-54-21.gif

FirearmsID.com barrel rifling diagram. This rifling illustration was created by Danish graphic artist Erik Dahlberg. It is published here courtesy FireArmsID.com, an excellent website for forensic firearms examiners.

Sinclair’s Simple Twist Rate Measurement Method

If are unsure of the twist rate of the barrel, you can measure it yourself in a couple of minutes. You need a good cleaning rod with a rotating handle and a jag with a fairly tight fitting patch. Utilize a rod guide if you are accessing the barrel through the breech or a muzzle guide if you are going to come in from the muzzle end. Make sure the rod rotates freely in the handle under load. Start the patch into the barrel for a few inches and then stop. Put a piece of tape at the back of the rod by the handle (like a flag) or mark the rod in some way. Measure how much of the rod is still protruding from the rod guide. You can either measure from the rod guide or muzzle guide back to the flag or to a spot on the handle. Next, continue to push the rod in until the mark or tape flag has made one complete revolution. Re-measure the amount of rod that is left sticking out of the barrel. Use the same reference marks as you did on the first measurement. Next, subtract this measurement from the first measurement. This number is the twist rate. For example, if the rod has 24 inches remaining at the start and 16 inches remain after making one revolution, you have 8 inches of travel, thus a 1:8 twist barrel.

I Prefer A Simpler Measurement Method That Won’t Over Tax You’re Brain

I push a cleaning rod thru the barrel from the breech end. For this method you have to use a cleaning rod that is long enough to extend all the way through the barrel and extend a few inches beyond the muzzle. The rod also has to have a ball bearing handle so the rod will rotate as you hold the handle and withdraw the rod.

This method requires using a tight fitting bore mop So as the rod is withdrawn from the barrel the tight fitting mop will cause the cleaning rod to rotate inside the barrel as the mop follows the spiral of the rifling.

Start by withdrawing the rod until you are sure that the rod is rotating inside of the barrel. To measure the twist rate I usually use a black sharpie and use it to put a T mark on the top of the rod just where it exits the rear receiver ring. Now as the rod is withdrawn the rod rotates and when the mark rotates back to top dead center you can us a ruler to measure the distance the rod traveled through the barrel to make one full rotation of the rod inside the barrel. The measurement equates directly to the twist rate.

You can repeat this process as many time that re needed to recheck the twist rate.
 
Last edited:
Rick,

Thank you VERY MUCH for compiling and publishing all this accuracy information. I've been looking for this type of info for quit a while and this post far exceeds what I thought I'd find. I'm going to print out the post as a PDF and squirrel it away with my other accuracy info.

Right now I'm working on the find the best powder measuring setup and have a little info to add.

After reading lots of posts about what the best powder scales are I to settled on the Ohaus M5. eBay is a good source for that scale but it seems everyone knows they are the best balance beam scale so they always go for a premium. While I was researching the M5 I ran across the vintage Ohaus 505. It's the exact same scale with out the 500 grain doubling weight. Unfortunately the quality powder scale buyers also know about the vintage Ohaus 505 so the prices aren't much different, but something to watch for.

During my research I also found that you can have your quality balance beam scale accurized so it will show beam deflection with 2 or 3 grains of the larger granular powders (that's according to the posts I've read but I have no first hand knowledge).

There are two guys that I've found. Scott Parker (Single Kernel Scales on FB) is in the US and Allan Edwards (m a i l (at) t a r g e t m a s t e r u k dot c o m) is across the pond.

I also ran across some powered powder tricklers. The one I bought is the Dandy 2-Speed Electric Powder Trickler which is made by Dandy Products, LLC in Mesa AZ but Allan Edwards makes a fully automated trickler with an electronic sensor that detects when the beam is on the "0".

Just my 2 cents.
 
FWIW, I have an RCBS electronic scale, and their Powdermaster electronic dispenser. When used together, they talk to each other... set up, push button, charge dispensed. Near as I can tell 0 (zero) deviation.

-Chris
 

Latest posts

Back
Top